I’ve automated my X posts with Airtable & Make.com

I've automated my X posts with Airtable & Make.com

10 kwi 2024

Automatyzacje

5 min

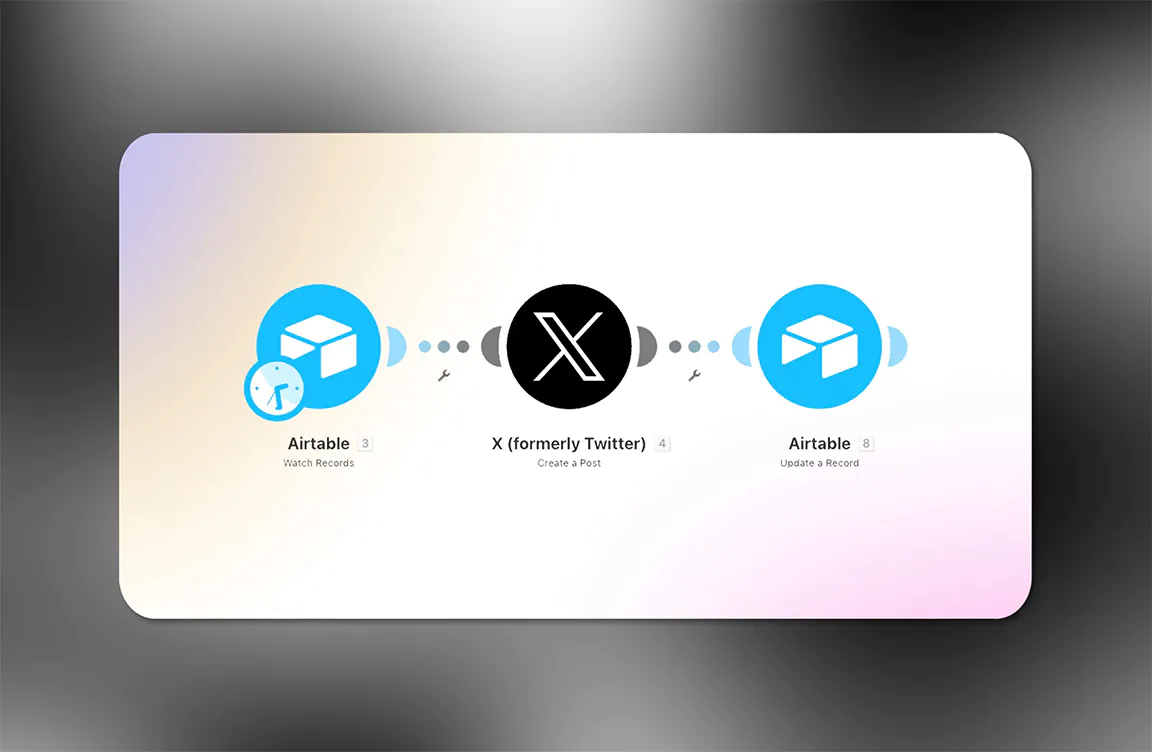
Schemat przepływu automatyzacji pokazujący integrację między Airtable a X (wcześniej Twitter). Trzy połączone ikony: dwa jasnoniebieskie loga Airtable z etykietami „Watch Records” i „Update a Record”, otaczające środkowe czarne logo X z etykietą „Create a Post”. Ilustruje konfigurację automatyzacji bez kodu Łukasza Ostrowskiego do planowania i publikowania treści na X z wykorzystaniem Airtable i Make.com.

What's going on? 

Let’s dive into how I’ve put a snooze button on manually posting to X by leveraging the automation process with Make.com and Airtable. 

If you’re like me, always looking for smarter ways to work, then you’re in for a treat. And the best part? You can start this for free. Yes, you heard it right, for free!

Quick Introduction

  • The Social Media Time Trap: Have you ever felt like social media posts are just gobbling up all your precious time? I know I did.

  • My Solution: That's when I decided to get crafty and automate my X posts using Airtable and Make.com.

  • The Domino Effect: It's like setting up a bunch of dominoes; once you tip the first one, the rest fall into place without you having to lift a finger.

  • No Cost to Start: And the cherry on top? You can kick things off without spending a penny.

Curious? Let's kick it off.

STEP 1 - Create a New Table in Airtable

We need a space to keep posts. I use Airtable. You can use other tools like Google Sheets or ClickUp, and use your creativity.

——

Make a table named “Social Media posts”. Include these fields:
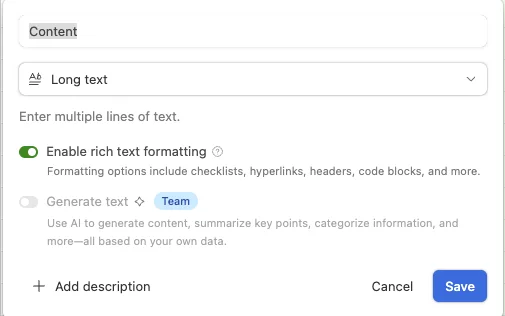

Airtable content entry interface showing 'Long text' field type, rich text formatting toggle, and AI-powered text generation option. Key component in Lucas Ostrowski's automated X posting system, integrating Airtable with Make.com for efficient social media management.

“Content:”
Field type: Long text;
Enable rich text formatting: on;
It’s our main field. We will store the post content here.

“Platform:”
Field type: Long text;
Options: X, Facebook, LinkedIn;
This field is for future use, in case I decide to post on other platforms as well.

“Approved:”
Field type: Checkbox;
I’ll be adding many posts as a brain dump. I want the option to review them before publishing. The system will not post them until they are approved.
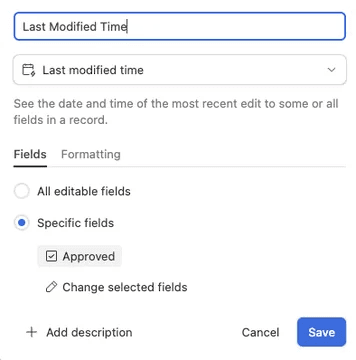

Airtable 'Last Modified Time' field configuration interface. Shows options for tracking edits on specific or all fields, crucial for Lucas Ostrowski's automated X posting system. Demonstrates granular control in Airtable for efficient social media automation workflow."

“Last Modified Time:”
Field type: Last modified time;
Set up to watch the “Approved” field. This will help decide which posts to get on Make.com. It will update automatically whenever the “Approved” field changes.

“Post Created:”
Field type: Checkbox;
This field determines if a post has been published or not.

Finally, the table we created in Airtable should look something like this:

Airtable database view of Lucas Ostrowski's automated X posting system. Shows content, platform, approval status, scheduling, and brand assets for multiple posts. Demonstrates efficient social media content management and automation workflow for a solo entrepreneur.

STEP 2 - Create an Airtable Grid view

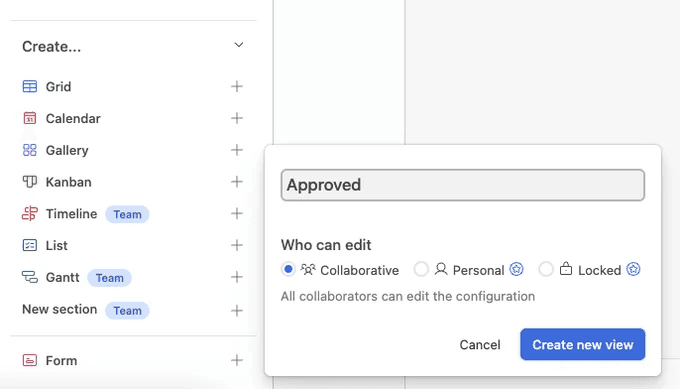
Airtable interface showing view creation options and 'Approved' field configuration. Displays Lucas Ostrowski's custom setup for social media automation, featuring collaborative editing settings. Demonstrates versatile project management capabilities in AI-driven business systems.

In Airtable, while on the “Social Media posts” table, add a new grid view. Call it “Approved“.


Airtable filter setup: Screenshot showing filter configuration for "Approved" and "postCreated" fields in Lucas Ostrowski's automated X posting system. Demonstrates efficient data management in no-code automation workflows using Airtable's interface for streamlined content approval process.

Set up filters in the new grid view to show only approved posts that have not been published yet:
1) “Approved” is selected
2) AND “Post Created” is not selected.

We can skip this step and do the full filtering in Make.com. It will make our lives much easier, though.

STEP 3 - Create nem Make.com scenario

It’s time to move to Make.com and initiate our automation by creating a new scenario.

Remember to name it correctly. Make.com can be difficult to navigate with scenarios, so using a clear naming convention is crucial to avoid getting lost.

I’m using the following standard: 

[[Prefix]] [Action trigger] -> [Action]

So in this case it will be: 

[Lucas Ostrowski X] Airtable approved post -> Publish on X
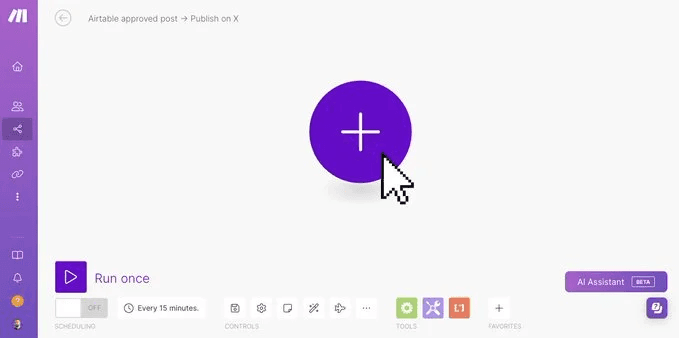
Make.com interface showcasing new scenario creation for "Airtable approved post + Publish on X" in Lucas Ostrowski's automation workflow. Purple UI with large add button and scheduler options illustrates the seamless integration of Airtable and X in no-code automation processes.


STEP 4 - Setup trigger

Finally, let’s begin creating the automation:

  • Click on the large purple “+” sign.

  • Search for “Airtable“.

  • Select “Search Records“.

If you haven’t set up an Airtable “Connection” yet, you’ll need to do so before proceeding. Just use “Airtable OAuth” and follow the process. Make.com will handle most of it for you; just approve the access.
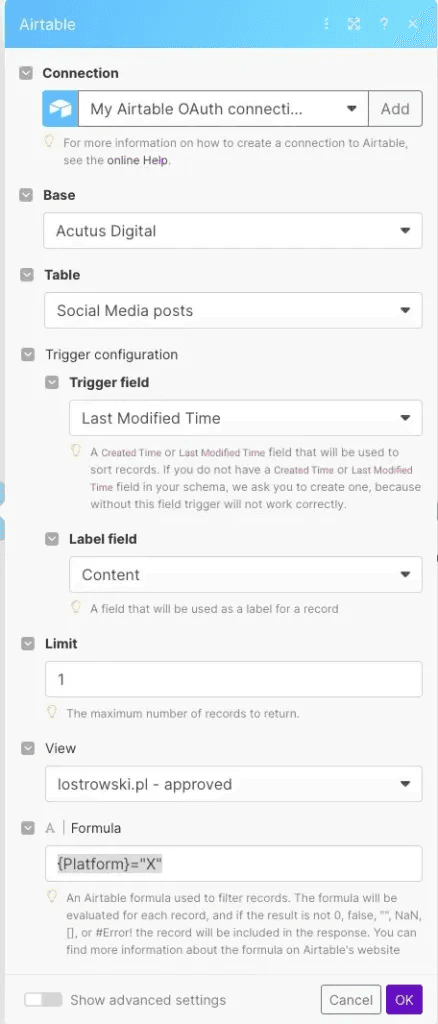

Make.com Airtable integration setup for Lucas Ostrowski's X post automation. Screenshot shows detailed configuration of Airtable trigger, including OAuth connection, base selection (Acutus Digital), table (Social Media posts), and custom filters. Demonstrates advanced no-code automation techniques for efficient content management and social media scheduling.

Next:

  • Choose the “Base” that contains our posts table.

  • Select the “Table” -> “Social Media posts”, the table you created in the first step.

  • Pick the “View” -> “Approved”, the view you set up in the second step. This view eliminates the need to write a Formula filter in Make.com.

  • Check “Select All” in the “Output Fields” section.

  • In the “Formula” field, add: ‘{Platform}=”X”‘. This step is optional if you only want posts for the “X” platform.

  • Enter “1” in the “Limit” field. We only want to publish one post at a time.

STEP 5 - X: Create a Post

Click on “Add another module” and search for “Twitter”. Even though the integration is now called “X”, it’s easier to find by searching for Twitter.

Choose “X (formerly Twitter)” and then “Create a Post“.

You’ll also need to set up a connection to “X”.

The free X API only allows for one application, but it’s straightforward. You can follow the instructions on Make.com. Feel free to comment or DM me if you encounter any issues.
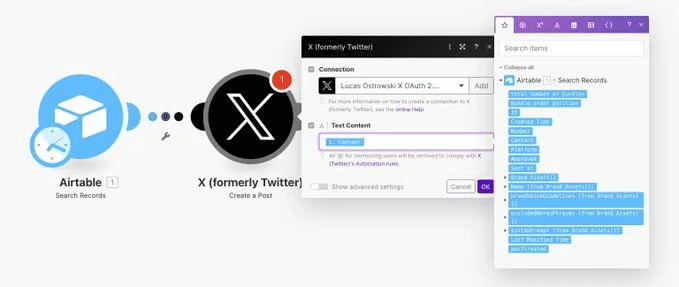

Make.com workflow visualization for Lucas Ostrowski's automated X posting system. Image shows integration between Airtable (Search Records) and X (Create a Post) modules, with detailed configuration panels. Exemplifies advanced no-code automation for seamless content publishing from database to social media platform.

Once your connection is established, select “Content” from the Airtable step for the “Text Content” field.

STEP 6 - Update Airtable Record

Click on “Add another module”, select “Airtable”, and then choose “Update a Record”.

Select the same “Base” and “Table” as you did in step 4.
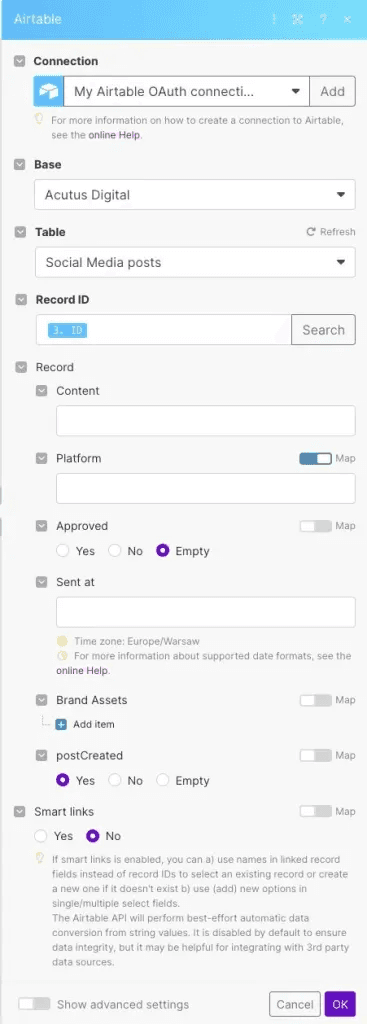
Make.com interface for updating Airtable records in Lucas Ostrowski's X post automation workflow. Screenshot shows detailed configuration of Airtable connection, including base (Acutus Digital), table (Social Media posts), and fields like Content, Platform, Approved, and postCreated. Demonstrates advanced no-code integration for efficient social media content management and tracking.


Put ID from the first step in “Record ID“, choose “Yes” for the “Post Created” field and leave everything else unchanged.

This step confirms that our post has been created.

STEP 7 - Test Make.com Scenario
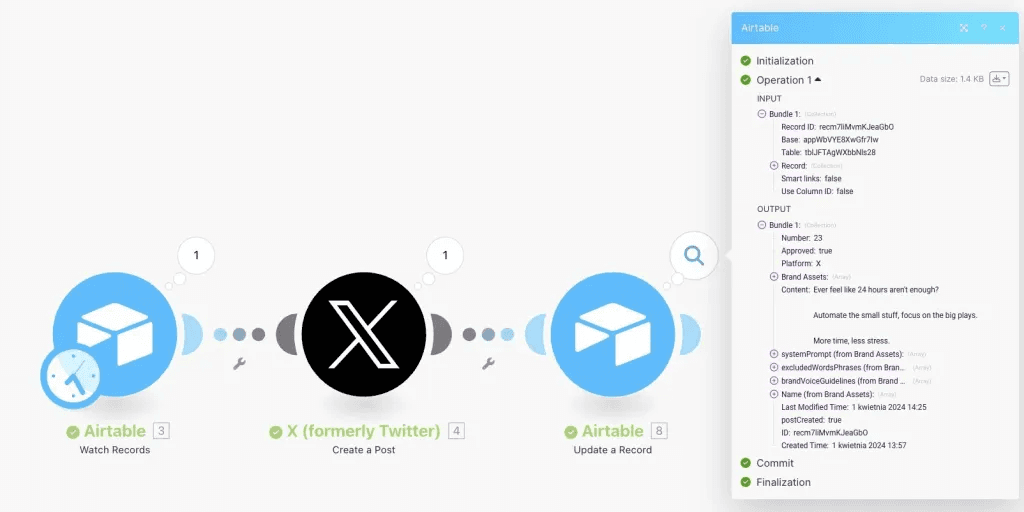
Make.com workflow diagram for Lucas Ostrowski's automated X posting system. Visual shows three-step process: Airtable Watch Records, X Create a Post, and Airtable Update a Record. Right panel displays detailed operation data, demonstrating seamless integration of no-code tools for efficient social media content management and automation.


Click “Run once” and watch the magic happen.

Screenshot of Lucas Ostrowski's automated X post demonstrating his no-code automation expertise. Tweet reads: "Ever feel like 24 hours aren't enough? Automate the small stuff, focus on the big plays. More time, less stress." Showcases successful implementation of Airtable and Make.com integration for efficient social media content publishing.

Check your X profile and Voilà, our post has been published!

STEP 8 - Finale: Set up Schedule

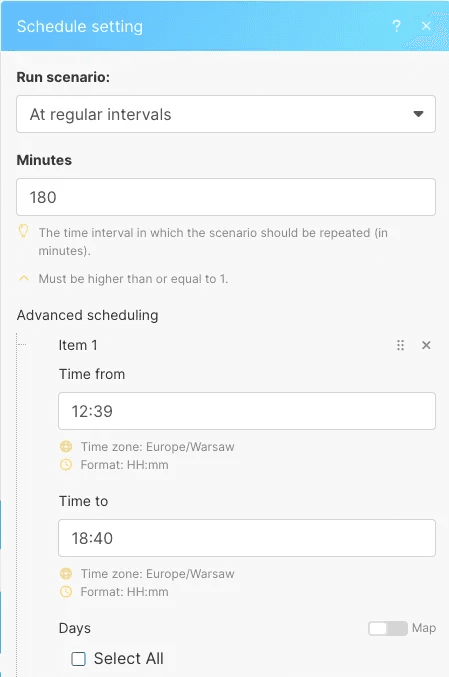
Click on the Watch icon at the start of the flow and set up your ideal schedule. In my case, I chose to publish 3 times a day, every 3 hours, starting at 12:39:
– Select “Run scenario” -> “At regular intervals
– “Minutes” -> “180
– “Advanced scheduling” -> “Time from” -> “12:39“; “Time to” -> “18:40


Make.com schedule configuration for Lucas Ostrowski's automated X posting system. Screenshot shows interval setting of 180 minutes and advanced scheduling from 12:39 to 18:40 (Europe/Warsaw time zone). Demonstrates precise timing control in no-code automation workflows for optimal social media content distribution.

Don’t forget to enable scheduling!

Save everything and it’s done!

——


This article includes affiliate links.
Najlepsze szablony

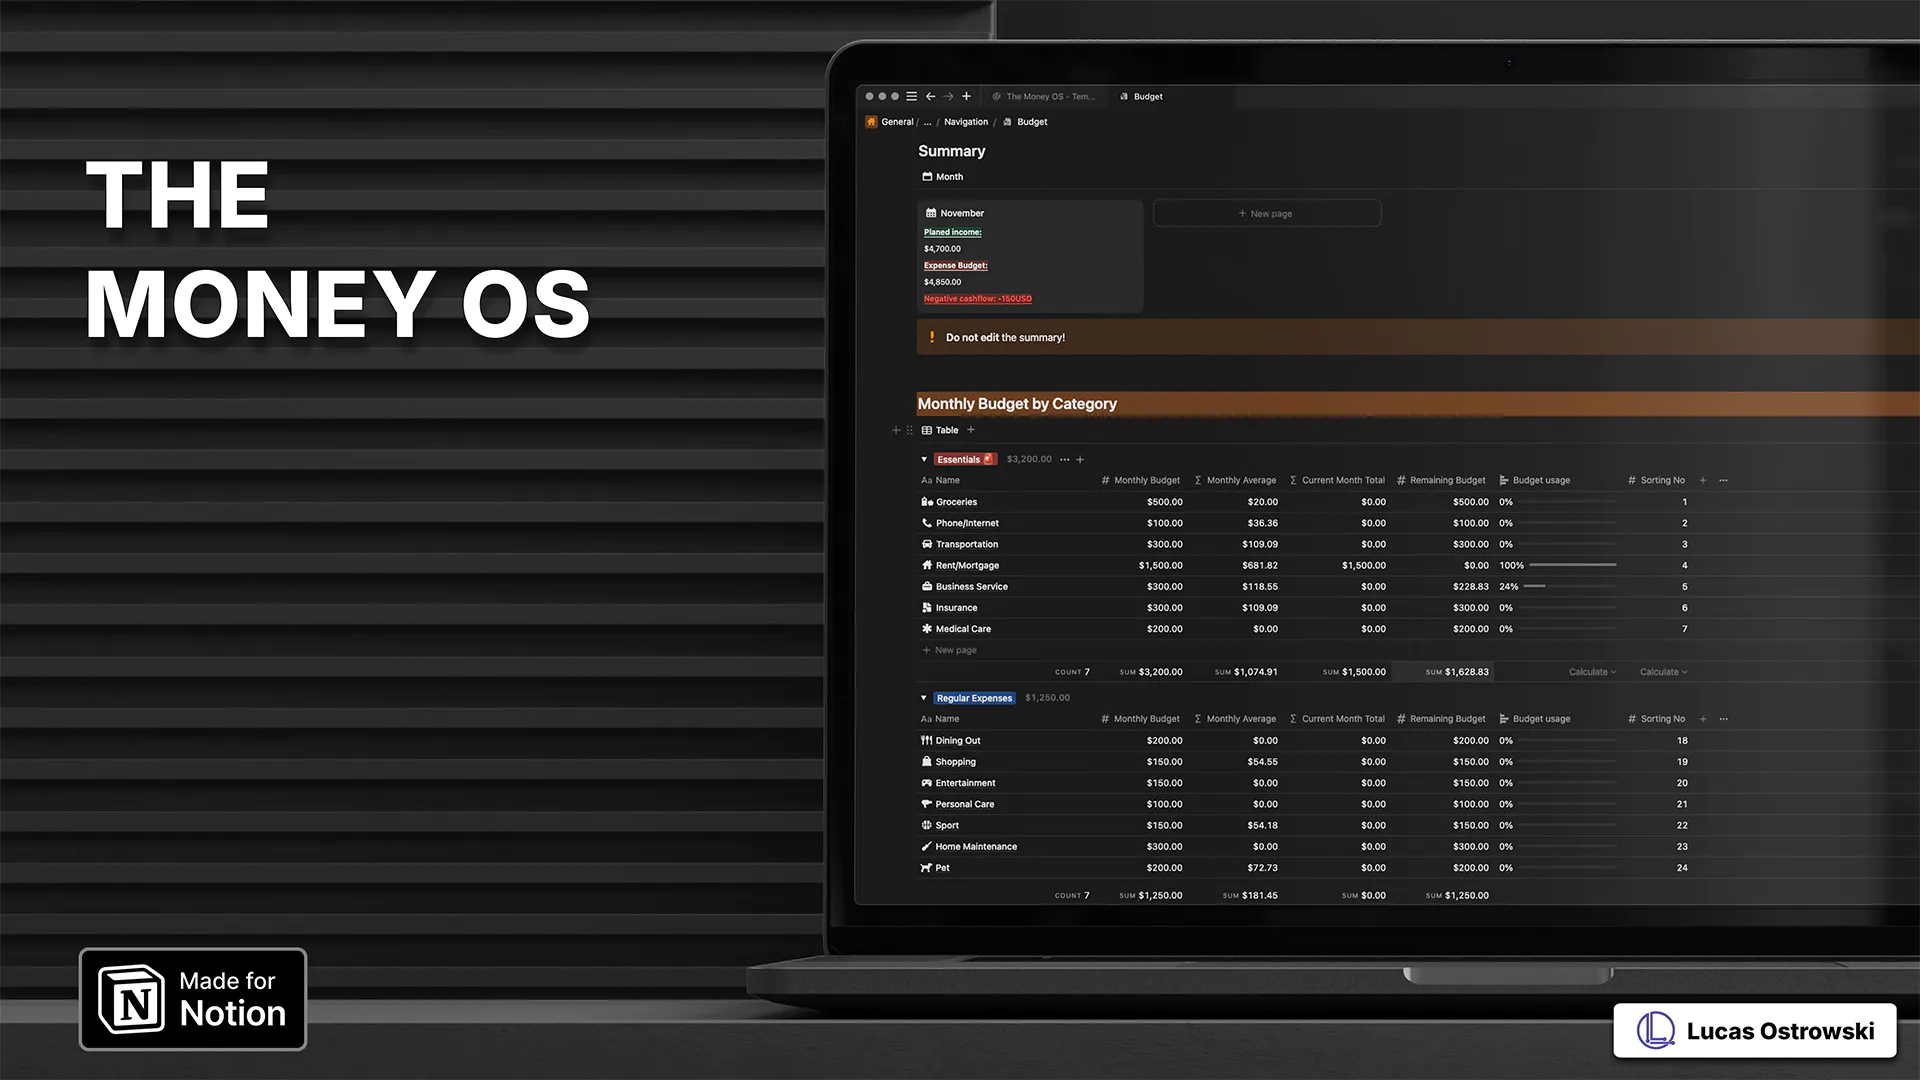
The Money OS Notion template displayed on two MacBook laptops against a dark, professional backdrop. Left screen shows sophisticated financial analytics with multiple line graphs tracking income and expenses over time. Right screen demonstrates the dark-mode interface with navigation icons and current month financial tracking. 'Made for Notion' badge in top-left corner emphasizes native integration. Stylish product visualization highlighting The Money OS's comprehensive financial management and analysis capabilities in a modern, premium presentation.
Notion SEO Keywords Generator template shown on laptop display featuring dark mode interface. Screenshot shows keyword research dashboard with metrics like search volume, KW intent, and CPC. Made for Notion badge and Lucas Ostrowski branding visible. Professional SEO tool for content optimization and keyword tracking.
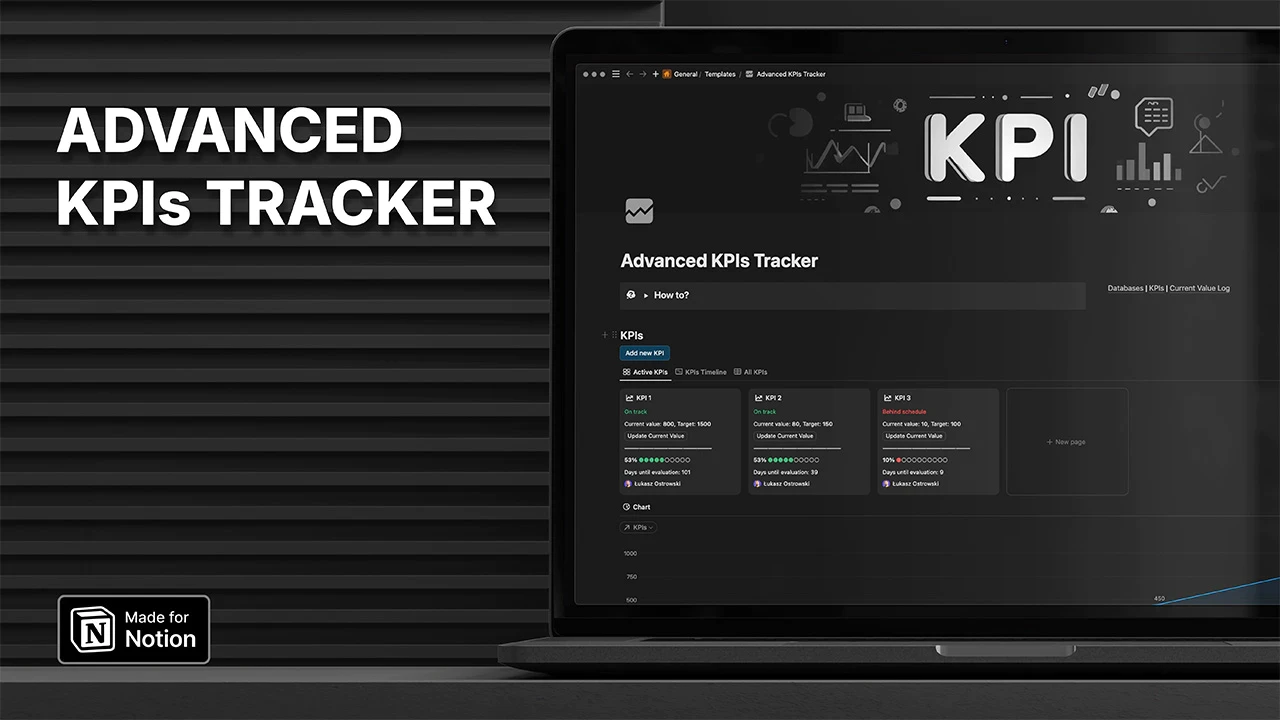
Advanced KPIs Tracker Notion template: Dark-mode interface with KPI dashboard, progress bars, and performance chart on laptop screen. Made for Notion."
Table of contents

Title

Title

Title

Dołącz do ponad tysiąca czytelników

Uzyskaj najnowsze informacje na temat AI, automatyzacji i systemów mających na celu optymalizację twojego życia i biznesu.

Dołącz do ponad tysiąca czytelników

Uzyskaj najnowsze informacje na temat AI, automatyzacji i systemów mających na celu optymalizację twojego życia i biznesu.

Dołącz do ponad tysiąca czytelników

Uzyskaj najnowsze informacje na temat AI, automatyzacji i systemów mających na celu optymalizację twojego życia i biznesu.