I’ve automated my X posts with Airtable & Make.com
I've automated my X posts with Airtable & Make.com
10 Apr 2024
Automation
5 mins
What's going on?
Let’s dive into how I’ve put a snooze button on manually posting to X by leveraging the automation process with Make.com and Airtable.
If you’re like me, always looking for smarter ways to work, then you’re in for a treat. And the best part? You can start this for free. Yes, you heard it right, for free!
Quick Introduction
The Social Media Time Trap: Have you ever felt like social media posts are just gobbling up all your precious time? I know I did.
My Solution: That's when I decided to get crafty and automate my X posts using Airtable and Make.com.
The Domino Effect: It's like setting up a bunch of dominoes; once you tip the first one, the rest fall into place without you having to lift a finger.
No Cost to Start: And the cherry on top? You can kick things off without spending a penny.
Curious? Let's kick it off.
STEP 1 - Create a New Table in Airtable
We need a space to keep posts. I use Airtable. You can use other tools like Google Sheets or ClickUp, and use your creativity.
——
Make a table named “Social Media posts”. Include these fields:
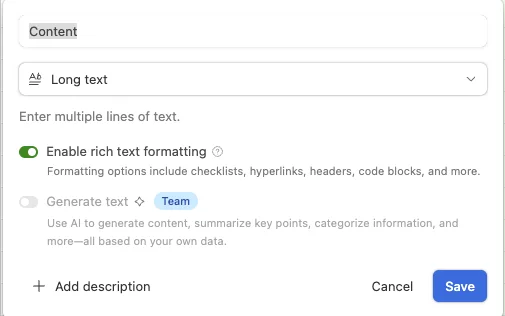
“Content:”
Field type: Long text;
Enable rich text formatting: on;
It’s our main field. We will store the post content here.
“Platform:”
Field type: Long text;
Options: X, Facebook, LinkedIn;
This field is for future use, in case I decide to post on other platforms as well.
“Approved:”
Field type: Checkbox;
I’ll be adding many posts as a brain dump. I want the option to review them before publishing. The system will not post them until they are approved.
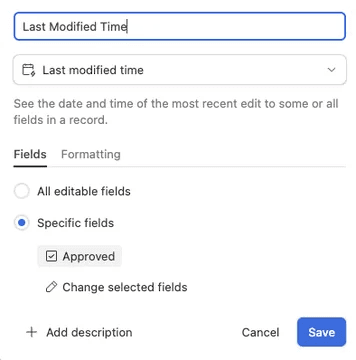
“Last Modified Time:”
Field type: Last modified time;
Set up to watch the “Approved” field. This will help decide which posts to get on Make.com. It will update automatically whenever the “Approved” field changes.
“Post Created:”
Field type: Checkbox;
This field determines if a post has been published or not.
Finally, the table we created in Airtable should look something like this:
STEP 2 - Create an Airtable Grid view
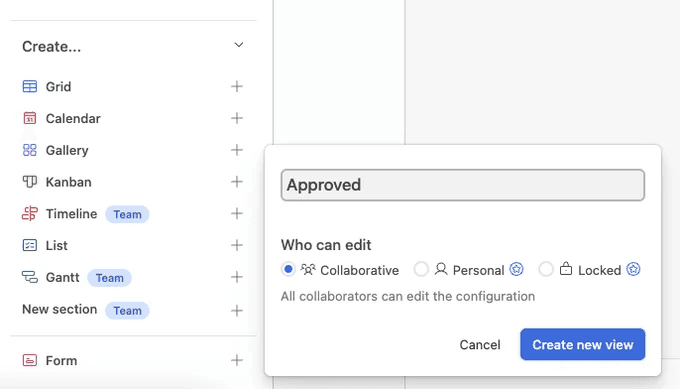
In Airtable, while on the “Social Media posts” table, add a new grid view. Call it “Approved“.

Set up filters in the new grid view to show only approved posts that have not been published yet:
1) “Approved” is selected
2) AND “Post Created” is not selected.
We can skip this step and do the full filtering in Make.com. It will make our lives much easier, though.
STEP 3 - Create nem Make.com scenario
It’s time to move to Make.com and initiate our automation by creating a new scenario.
Remember to name it correctly. Make.com can be difficult to navigate with scenarios, so using a clear naming convention is crucial to avoid getting lost.
I’m using the following standard:
[[Prefix]] [Action trigger] -> [Action]
So in this case it will be:
[Lucas Ostrowski X] Airtable approved post -> Publish on X

STEP 4 - Setup trigger
Finally, let’s begin creating the automation:
Click on the large purple “+” sign.
Search for “Airtable“.
Select “Search Records“.
If you haven’t set up an Airtable “Connection” yet, you’ll need to do so before proceeding. Just use “Airtable OAuth” and follow the process. Make.com will handle most of it for you; just approve the access.
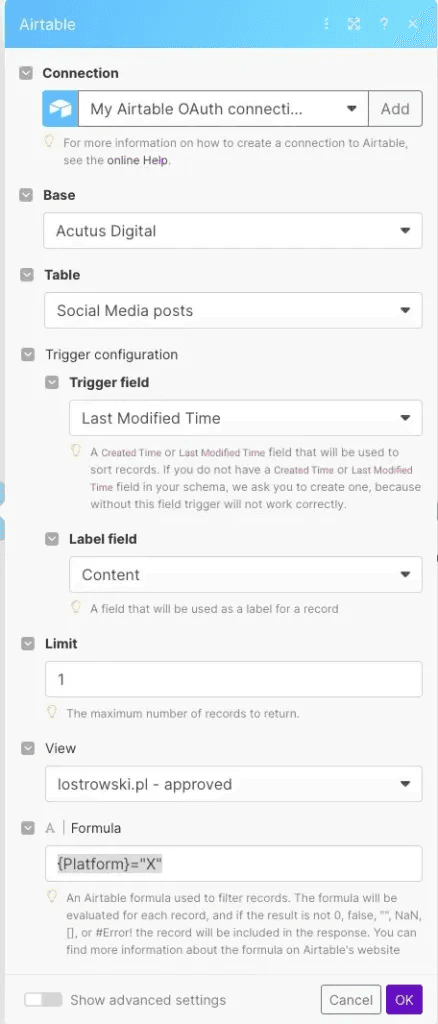
Next:
Choose the “Base” that contains our posts table.
Select the “Table” -> “Social Media posts”, the table you created in the first step.
Pick the “View” -> “Approved”, the view you set up in the second step. This view eliminates the need to write a Formula filter in Make.com.
Check “Select All” in the “Output Fields” section.
In the “Formula” field, add: ‘{Platform}=”X”‘. This step is optional if you only want posts for the “X” platform.
Enter “1” in the “Limit” field. We only want to publish one post at a time.
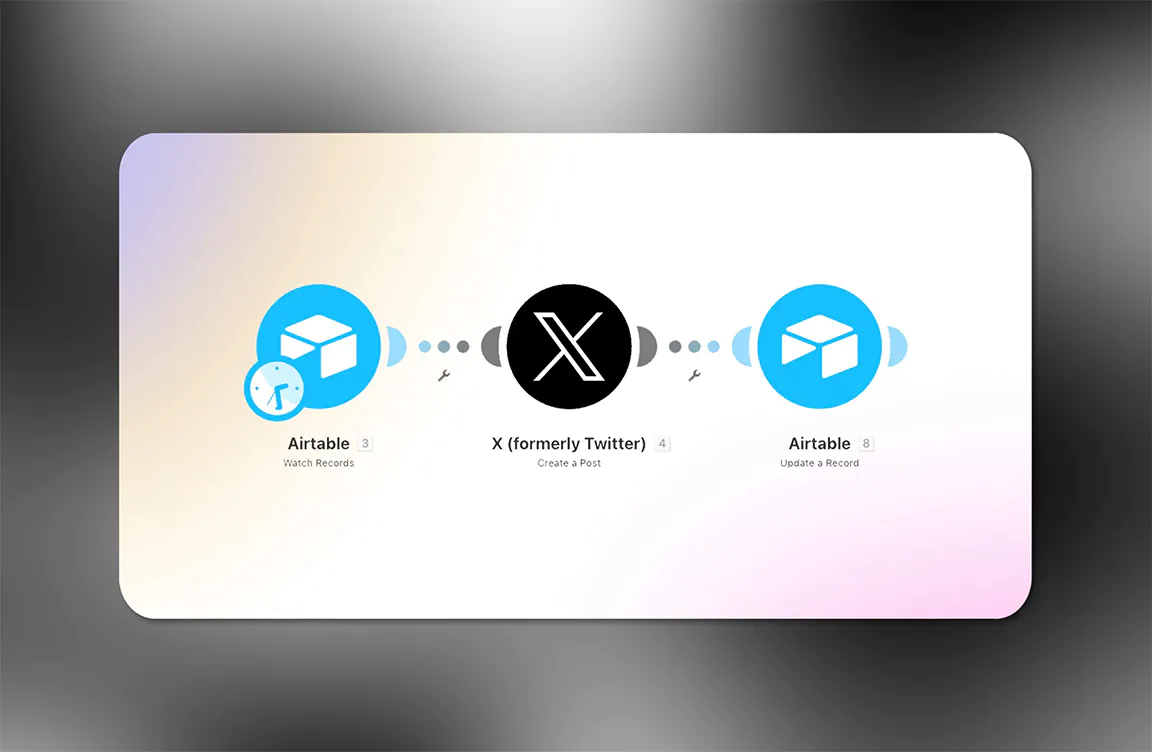
STEP 5 - X: Create a Post
Click on “Add another module” and search for “Twitter”. Even though the integration is now called “X”, it’s easier to find by searching for Twitter.
Choose “X (formerly Twitter)” and then “Create a Post“.
You’ll also need to set up a connection to “X”.
The free X API only allows for one application, but it’s straightforward. You can follow the instructions on Make.com. Feel free to comment or DM me if you encounter any issues.
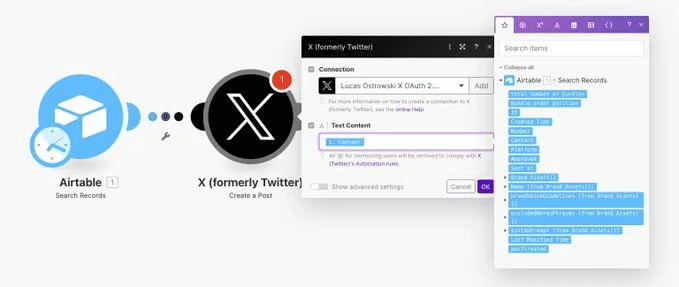
Once your connection is established, select “Content” from the Airtable step for the “Text Content” field.
STEP 6 - Update Airtable Record
Click on “Add another module”, select “Airtable”, and then choose “Update a Record”.
Select the same “Base” and “Table” as you did in step 4.
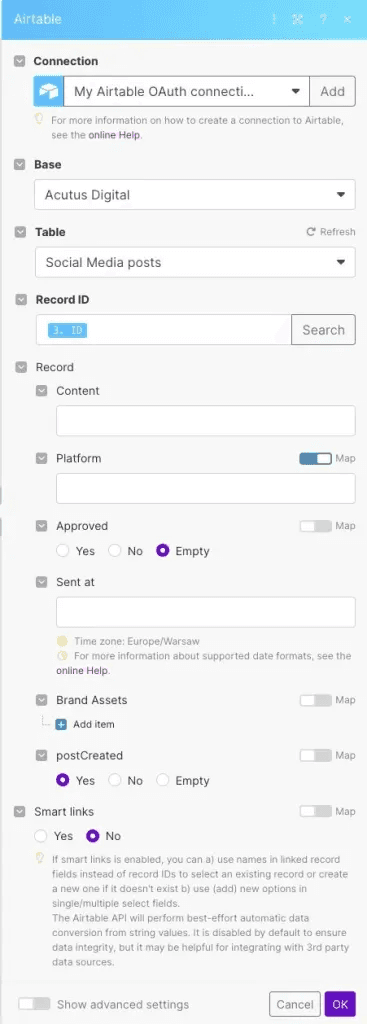
Put ID from the first step in “Record ID“, choose “Yes” for the “Post Created” field and leave everything else unchanged.
This step confirms that our post has been created.
STEP 7 - Test Make.com Scenario
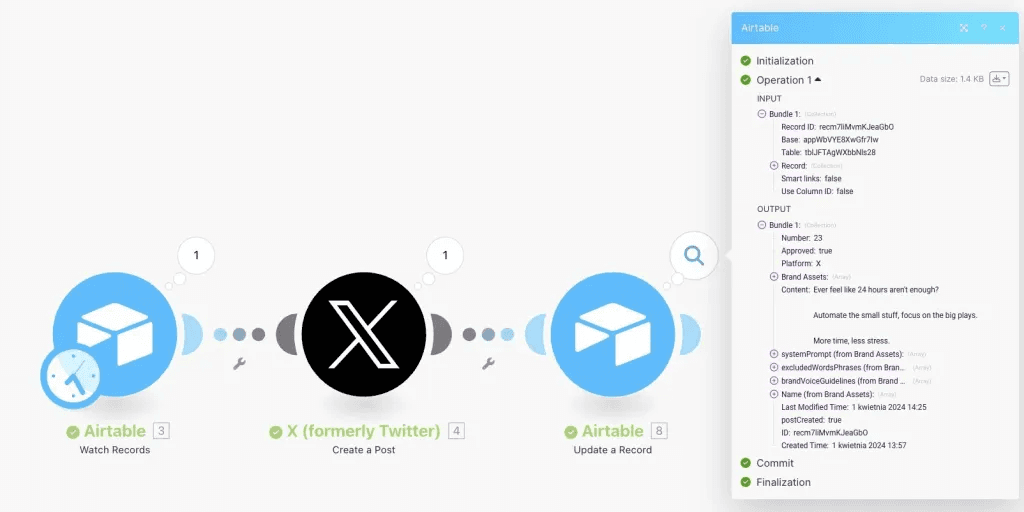
Click “Run once” and watch the magic happen.

Check your X profile and Voilà, our post has been published!
STEP 8 - Finale: Set up Schedule
Click on the Watch icon at the start of the flow and set up your ideal schedule. In my case, I chose to publish 3 times a day, every 3 hours, starting at 12:39:
– Select “Run scenario” -> “At regular intervals“
– “Minutes” -> “180“
– “Advanced scheduling” -> “Time from” -> “12:39“; “Time to” -> “18:40“
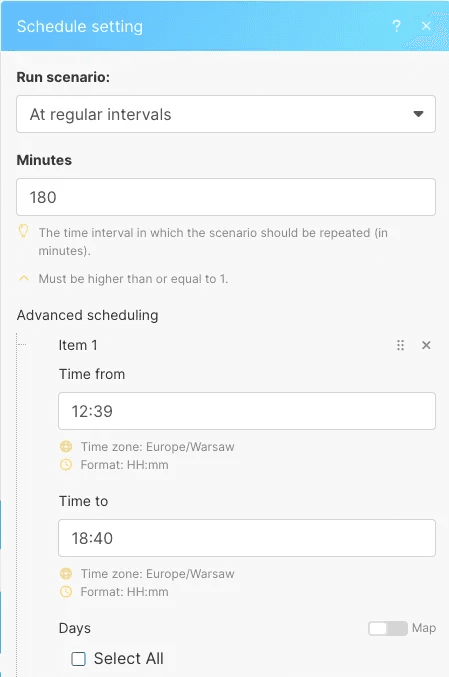
Don’t forget to enable scheduling!
Save everything and it’s done!
——
This article includes affiliate links.
